Level Up Your Printables - 6 Tips & Tricks

Level up your printables from Teresa Collins Studio with these 6 tips & tricks!
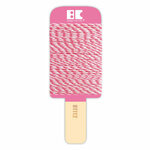
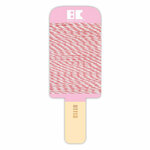
Teresa Collins Studio - Planner Bookmarks

1) Print on heavier paper
Printing on paper heavier (greater than 65lb), rather than text weight paper (23-32lb) gives your project some heft and sturdiness. {Just be careful that not to get paper too thick/heavy that it won't go through your printer - Neenah 110lb Cover will not go through my current printer.}
Here are two papers which have worked well for me:
2) Add pops of color with markers or colored pencils
3) Laminate with either glossy or MATTE laminating pouches. (Yes, you heard me matte laminating pouches - they're a game changer.)
Lamination pouches come in 4 thicknesses: 3mil, 5mil, 7mil, & 10mil. Any thickness will add to the sturdiness of your project, but 10mil is the thickness of standard planner & notebook covers.
Lamination pouches come in a glossy finish, as we all know, but they also come in matte. Let me tell you the matte lamination feels AMAZING - it's soft and silky. You can also write on the matte ouches once you've run them through your laminator. I used matte lamination for this project: 3mil for the two bookmarks with twine toppers and 10mil for the 'Strong' planner bookmark, punched with a mushroom punch.
Here are the laminating pouches I used:
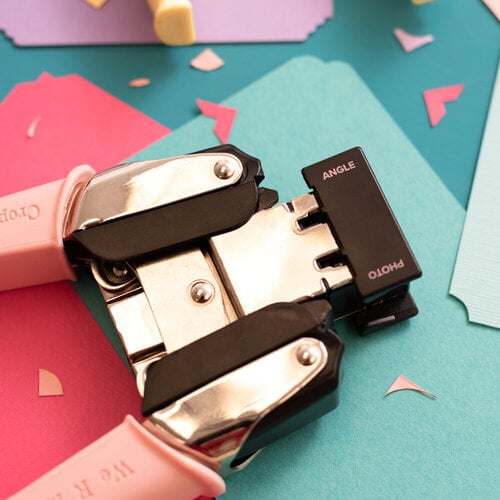
4) Punch holes at the top or punch holes to fit in you planner. Also use an angle cut at the top for more interest.
To cut the top of my two bookmarks at an angle I used another Crop-a-Dile product, but you can just eyeball it and cut a half inch corner off the top edges.
The Crop-a-Dile Corner Chomper - Angle & Photo
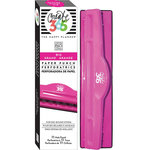
Me and My Big Ideas - Create 365 Collection - Planner - Big Punch
from: Scrapbook.com
5) Add an eyelet in the top hole
Add a little jewelry, a bit of sparkle to the top of your book mark with an eyelet of your choice. Here I simply used the eyelets that came with my Crop-a-Dile.
6) Use twine or embroidery floss for a crowning finish!
I chose a gold metallic, accented bakers twine for the 'Strong' bookmark and three different shades of pink to match the pink rainbows.

Here's another selection:

- Best Creation Inc - Baker's Twine - Hot Pink
- Price: $1.89
- Best Creation Inc - Baker's Twine - Pink
- Price: $1.89


Thank you SO much for reading & I'll catch y'all in the next blog post.


Comments
Post a Comment